|
As part of production Wild Gears are already wiped down with 99% rubbing alcohol. I wear gloves to keep my hands safe from that. I will be simply extending the use of clean gloves to encompass the rest of the handling and packing process.
If you have any questions or concerns, please comment below
2 Comments
The Wild Gears Shop now lists prices in CAD (Canadian Dollars) rather than USD (American Dollars). The prices may look higher $99 CAD compared to $80 USD but as of 7PM March 13 2020 (time of writing) $99 CAD is just $71 USD.
My intention is not to lower the prices by much but I also don't want to micromanage them so I took a price conversion that would sit around $76 USD for the past year of currency price fictionalizations. If some price seems wildly incorrect, for an item or for shipping, I'd like to hear about it. These changes have been made quickly and an error may have slipped in. I am making these changes now because of sudden changes made by my web store provider. In the coming month I hope to further improve the Wild Gears Shop to display the prices in your preferred currency. And if I can manage it to generate more precise shipping quotes for each order. New gear sets are finally here! There are a lot of new gear sets to talk about and I'm super excited to share them all with you today. The Spring Collection includes:
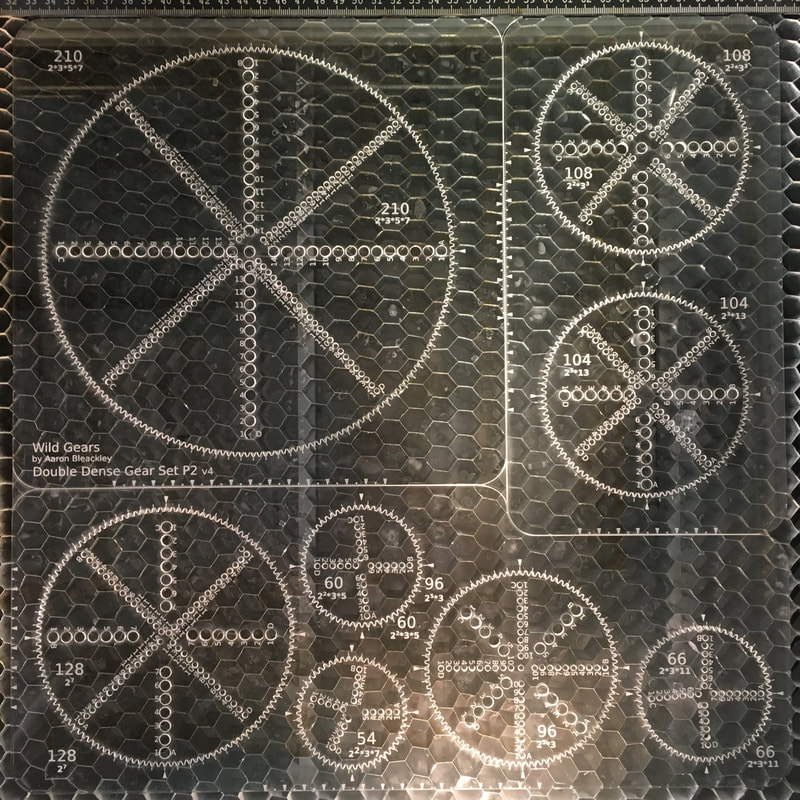
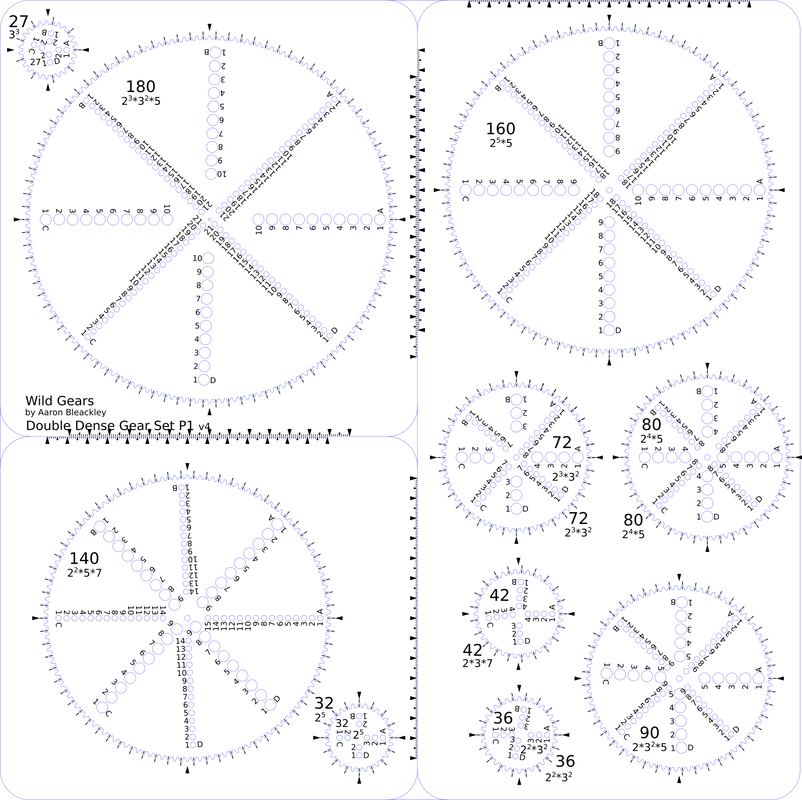
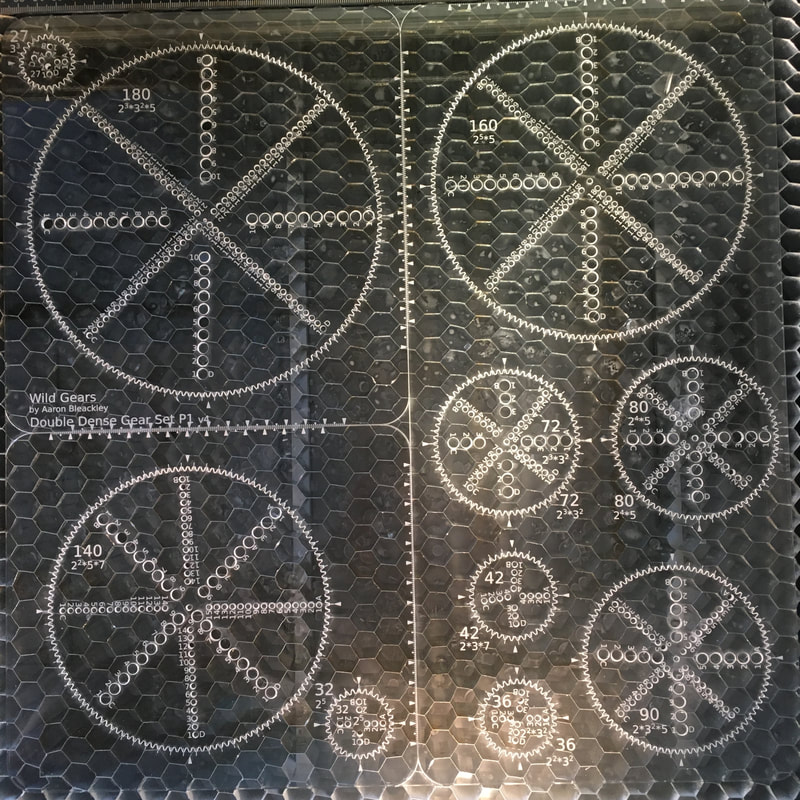
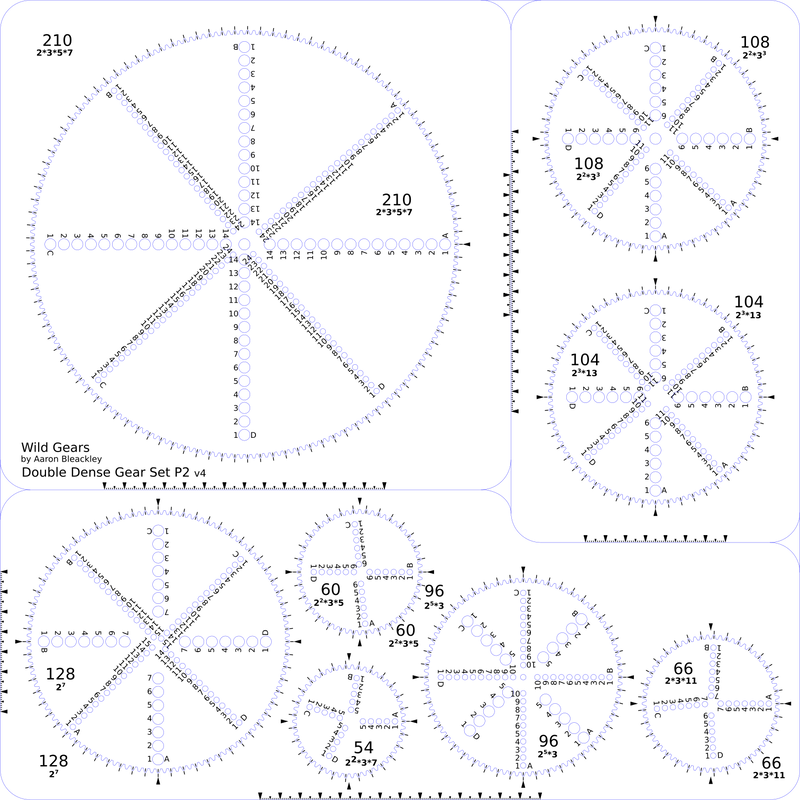
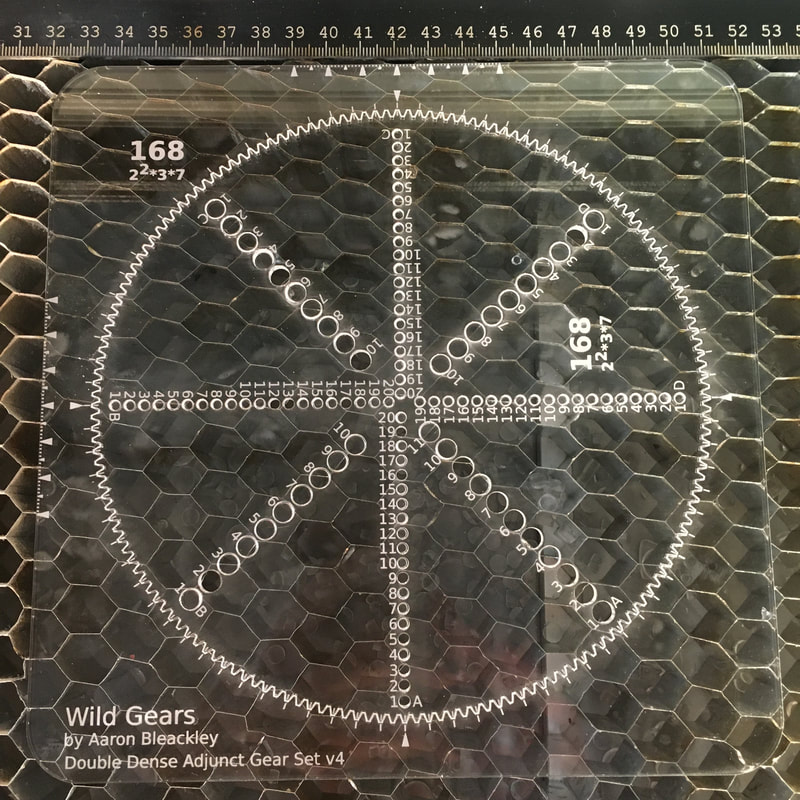
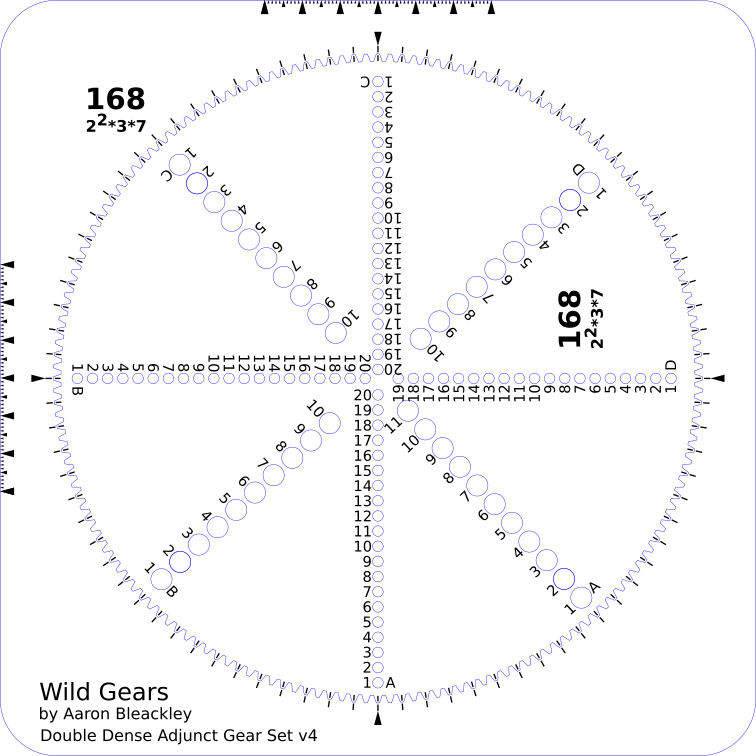
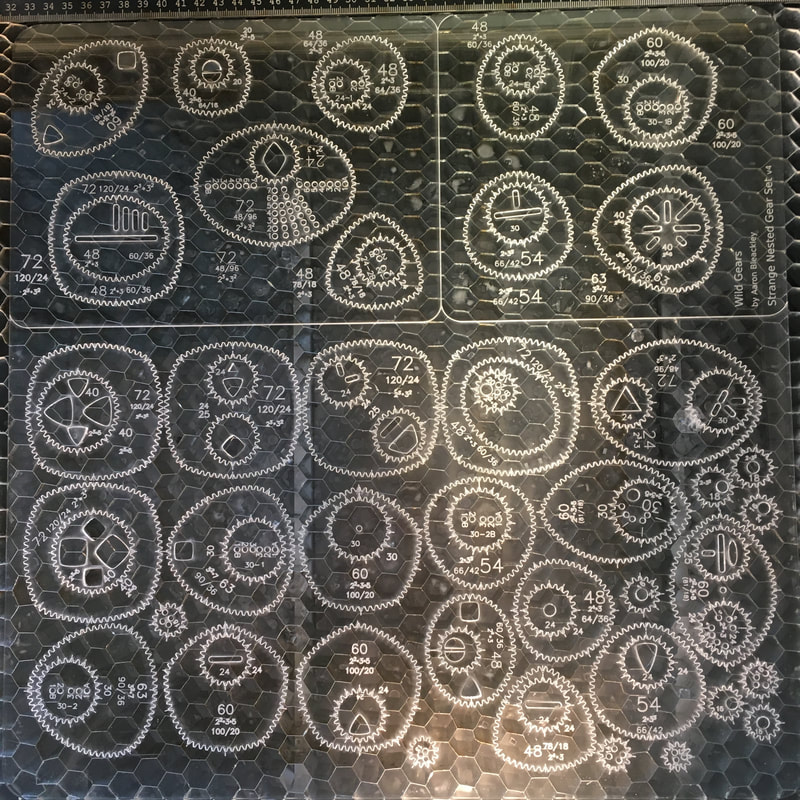
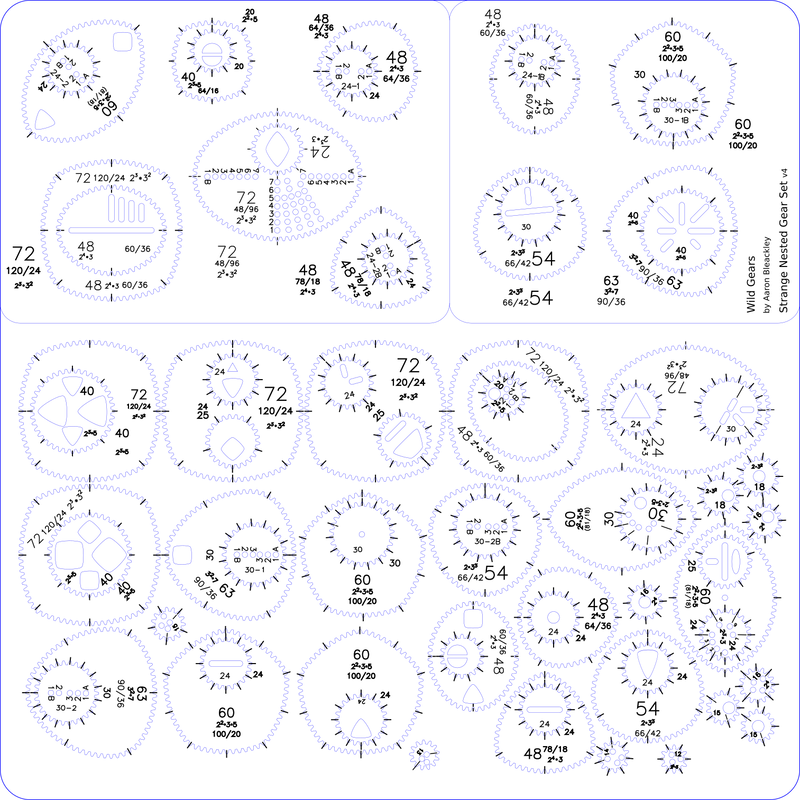
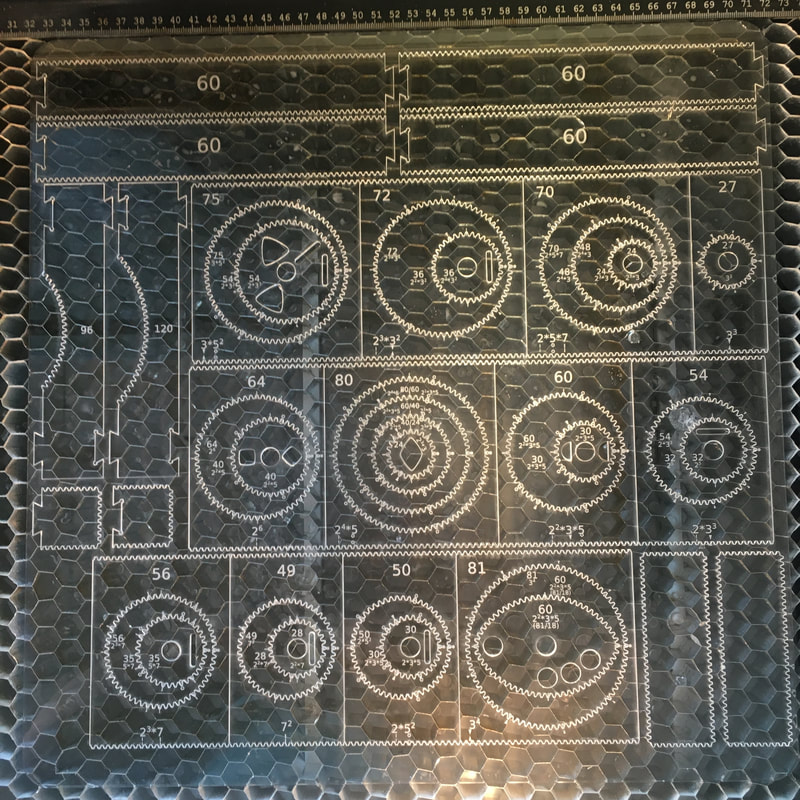
Double Dense Gear SetsThere are two large gear sets and one adjunct gear set from this project. They can each be purchased separately but will also be sold as a bundle at a discount Double Dense gears have 4 lines of pen holes instead of two and can make designs with tighter spacing between each element. In the coming weeks I will be taking proper product photos of all these gear sets and making full product pages for them. So for now these are pictures of the prototypes as they come off the laser cutter honeycomb. Link to the shop listing Shapes Hoops Gear SetThis is a large gear set that packs a lot of non-circular gears full of smaller gears. Due to the repetition of many of the gear sizes these cutouts are given non-circular pen holes for an sub-theme and expires different ways to and a non-circular element to the final design. There are repetitions of each shape in this gear set. The frame is divided into three pieces. In the two smaller ones at the top the cutouts are given enough space for the frame to be solid and can be used for making the art, they also contain one example of each of the shapes in the lower portion. The larger lower frame is more fragile and designed to be discarded, or at least is likely to break with much handling and is there for shipping the gear securely. Link to the shop listing Variations on the Enormous Gear SetIn designing early gear sets like the Full Page Gear Set I tried to put as much diversity and variety into it as possible. But this meant that there was just a bit of everything in it so if there is any one element like prime factors or powers of two that you want to dive super deeply into it only has a bit of that for you to focus on. With a bunch of the new more complicated techniques that have arisen for complex design composition, using the Nested Oblong Gear Set or the Stationary center gear technique as two examples, there has been a desire for a more focused set of gears looking at factors of two and three. The Doubling Enormous Gear Set is that exploration. 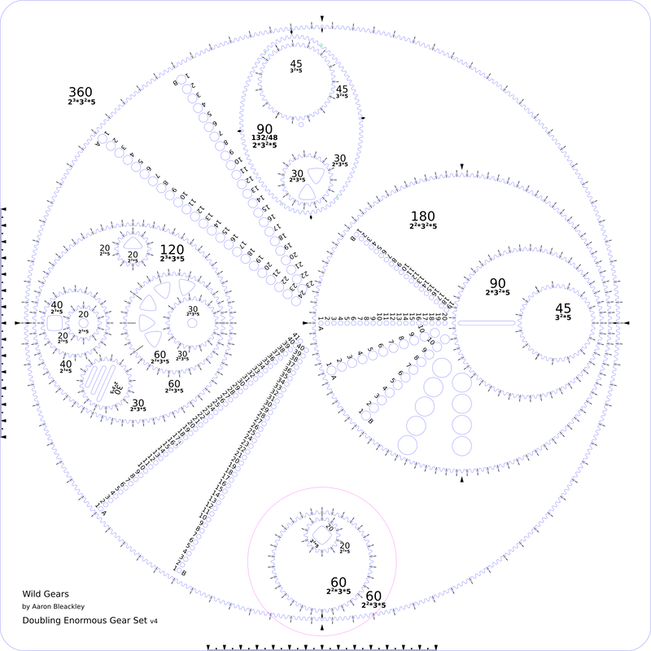 It provides lots of nested gears in cascading powers of two or three. This design is almost finished, I'm just polishing the last of the fine details; like filling in the 45 gears. It will be done in the next days The other new variation on enormous gears is the Modified Enormous Gear Set which starts from 288 and explores similar themes and adds two thicker hoops around the outside 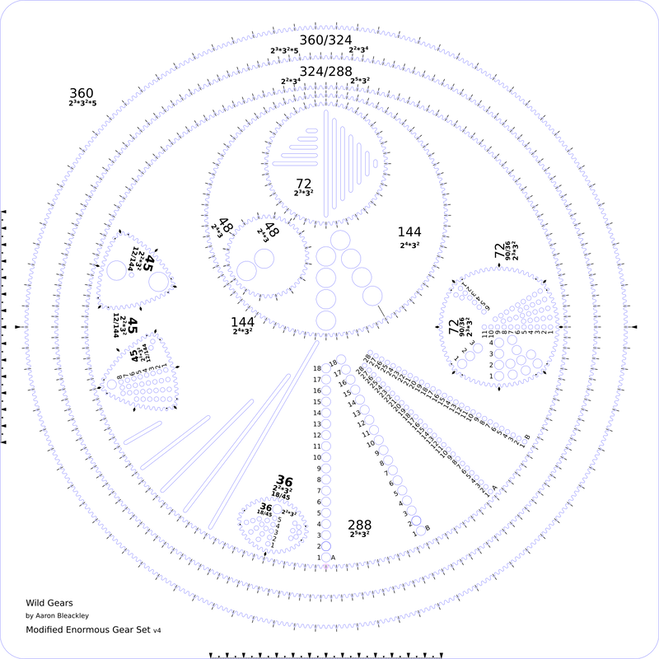 To support these themes I've also made an adjunct gear set.  Modular Gear Set: Mandala MakerThe idea behind this gear set comes from the desire to make radial positioning of hoops easier. Before the Mandala Maker Gear Set If you wanted to make a big design where your hoops are at different distances and degrees from a center point it was very hard and imprecise. Now there is a gear set for this. You can step a rack gear system around a central gear; controlling degrees of rotation and distance from the center point. This is a modular gear set that makes an oblong frame with an arc segment at each end that can mesh with a 120 or 96 gear. The rest of the gear set are a set of 'cartridge' pieces that are toothed on the top and bottom and have a centered gear cutout. This means that the whole oblong can rotate in steps around the 120 or 96 gear and that each cartridge can move incrementally one tooth at a time. There are approximately 10,000 positions for each of the cartridges. Link to the shop listing Modular Gear Set: Modular OblongsWorking on the Mandala Maker I realized that I could make a much more general purpose modular set that could make an oblong, like in the Nested Oblong Gear Set, of any length that could pinch any hoop. Oblong pieces for any size of hoop! Very exciting, but also very fiddly; the precision required to hold the hoops securely but not too snugly was very tight. This gear set has two main parts. The linear gear pieces, which make up the toothed top and bottom of the oblong, and the spacer pieces as well as the right angle corners which have no teeth. The spacer pieces are 10-15 mm with the 10 and 11 mm ones going up by 0.25 mm increments. The idea is to use the rack pieces to build most of the length of the sides and then fill in the last bit of distance with a few spacer pieces so that the hoop fits perfectly in the oblong that is created. You'll notice that there are some 96/120 pieces that look like the end caps from the mandala maker gear set. These are included so that whatever oblong is created can be stepped around a gear too if desired. I tried for a long time to find a way to bring these two gear sets together into one cohesive piece but I concluded that there is room for them both. The Mandala maker is easier to put together and use and has a lot of options available. The modular oblong gear set is a lot more fiddly to setup. It requires trial and error and takes a few minutes to fit the oblong to the hoop. That being said, it is hugely adjustable and can do far more. Link to the shop listing Can I Order?Wild Gears is still operating. I don't have any employees, its just me, so there is no risk of workplace crowding. I've enhance my handling and safety procedures based on my best understanding of good practices. Postal systems are still delivering so I'll continue to do my job and make art tools and toys for people. If you have any questions at all please comment or email me at info@wildgears.com I know that there has been a lot of new gear sets without a lot of specific words about any of them. Other NewsNew Material
Wild Gears are now made from 100% recycled clear acrylic. My acrylic supplier started carrying it and it works really well so I'm happy to say that Wild Gears is now a greener product. Hurrah! New Discount tier: If you order 6 large gear sets or more you can use the code "BUNDLE25" for 25% off the entire order. Whole Shebang: The one of every gear set bundle has been updated to include all the new spring 2020 collection gear sets. Its price has been increased but only partially. In mid March the price will be re-assessed . Discount For Everyone: Are you buying something? Do you want $20 off? Use the code "HomeFun" at checkout. This blog post has more details. Thank-you for your time and attention. Your interest in Wild Gears means so much to me. Cheers, Aaron I was inspired by some posts in reddit.com/r/spirograph by u/HomegrownTomato. These three posts inspired me to try and understand this technique: This technique uses:
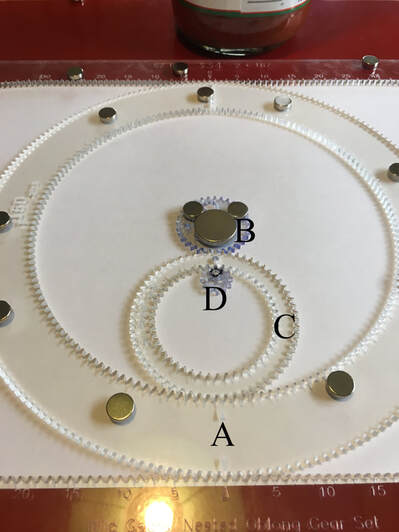 Letter labeled setup In this specific setup gear D makes a square in hoop C. Once it has been iterated once the next step is to move hoop C by one step. In the picture above I was returning gear D back to being near gear B so it is easy to lift up hoop C where it touches hoop A and rotate it by one tooth. Lets call this Outer Stepping 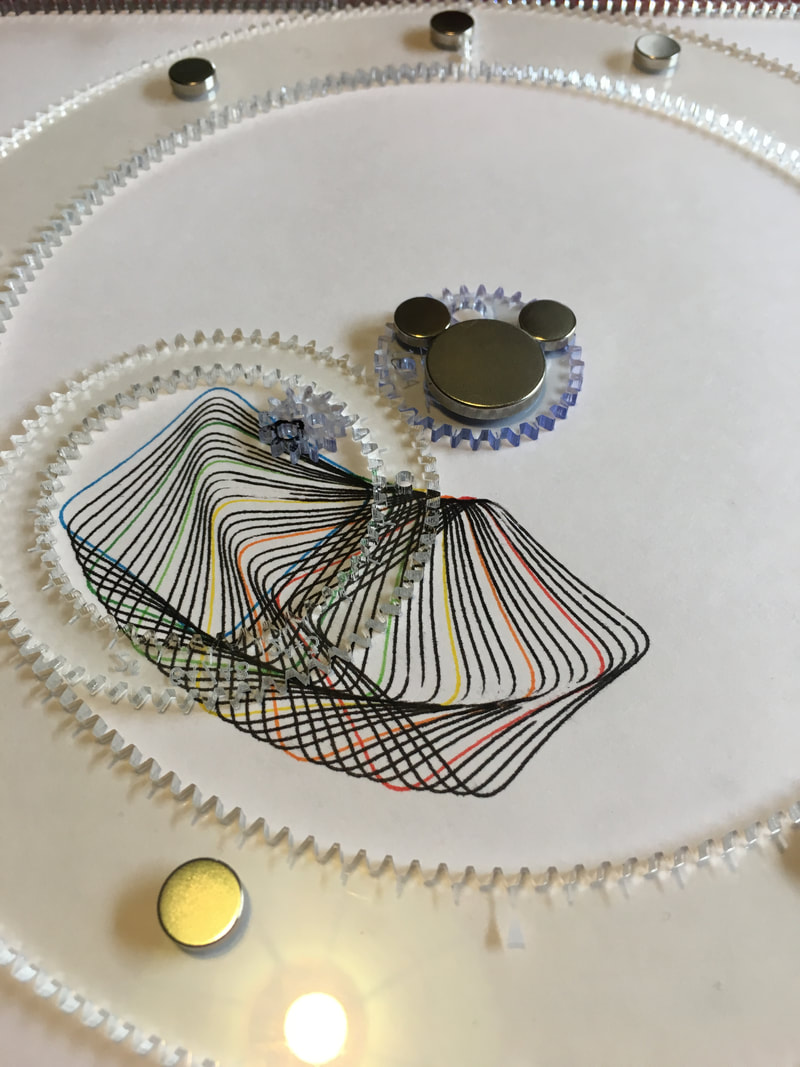 In progress Outer Stepping example 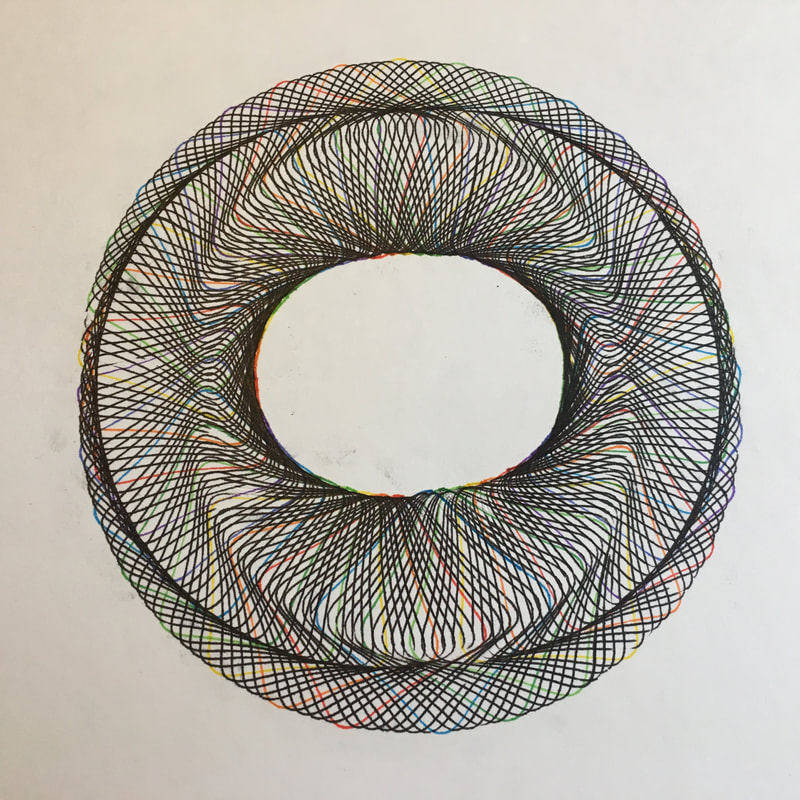 completed Center Secured Outer Stepping design Another way to do this would be to put gear D at the bottom of hoop C near the A label so that the hoop C can be lifted up where it touches gear B and rotated by one tooth. Lets call this Inner Stepping. With no other changes Outer Stepping and Inner Stepping produce different designs. 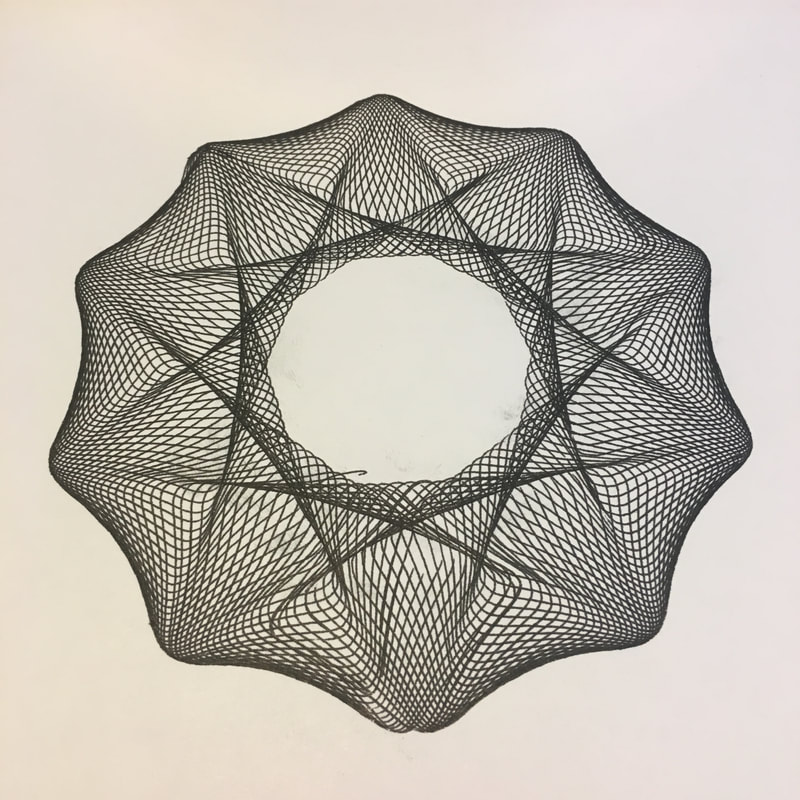 completed Center Secured Inner Stepping technique The Outer and Inner stepping techniques produce designs that are differently wobbly and folded based on their the relationship between different gear ratios of the 4 parts in the system. The pieces used in this setup were:
How Do You Fit a Stationary Gear In The Middle? This seems like it would be really daunting to find a combination of ring, gear, and hoop that fits together correctly for this technique but there is a simple math answer to the problem. Add up two times the hoop (C) tooth count and the tooth count of the center gear (B). This number needs to equal the ring (A) tooth count. 2C+B=A. So you've found your gear combo. How to center it? Place hoop C in ring A and do your best to put gear B in the middle of the ring A. This won't be perfectly centered but if you hold down gear B and move hoop C about 90 degrees around the ring and reposition gear B to be snugged up to the hoop again. By repeating this step at least 4 times it should iteratively center the stationary gear. Also, while working on the design it may be beneficial to snug the center stationary gear B up to stationary hoop C to keep it really solid and snug. This is a very small adjustment that is optional but may make things work better. I found that using magnets and a metal board made this setup work really good. Using putty, tape, or weights would probably work well too to keep the stationary parts stationary. Gear Sets used in this recipe:
Plentiful Gear Set (160) Hoops Gear Set (64/48) Compact Gear Set (12 & 32) Hi r/spirograph! It really is me.   Mammoth gear set design 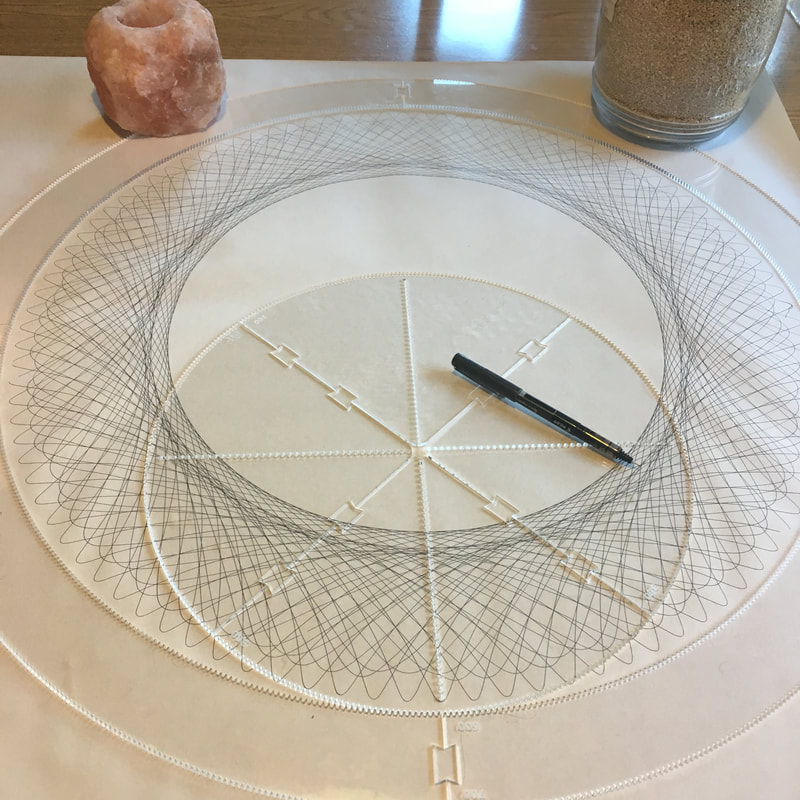 Mammoth Gear Set prototype 1. pen for scale. The hoop in this picture is 700/600 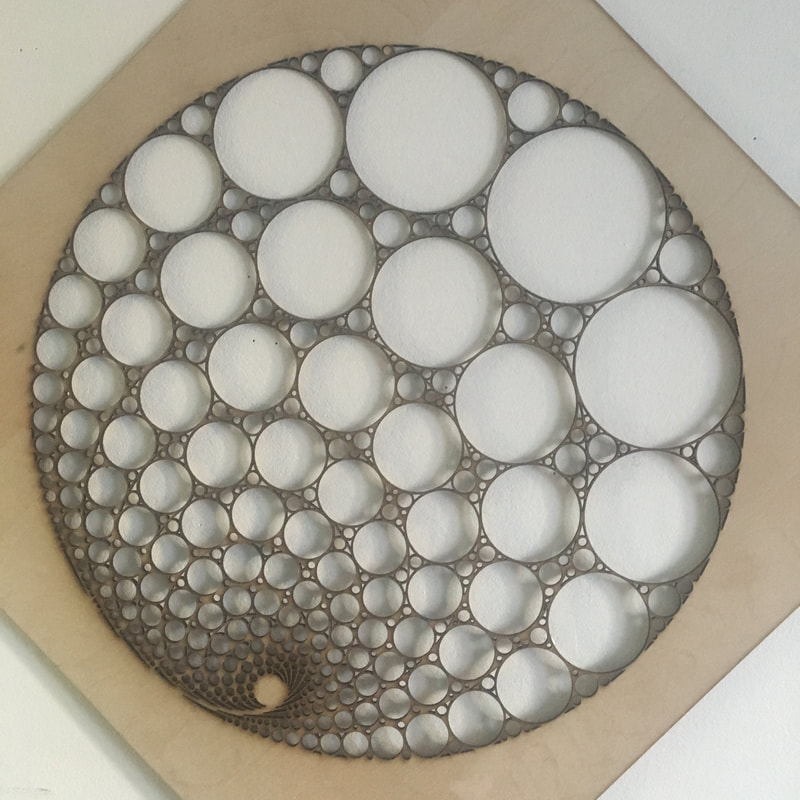 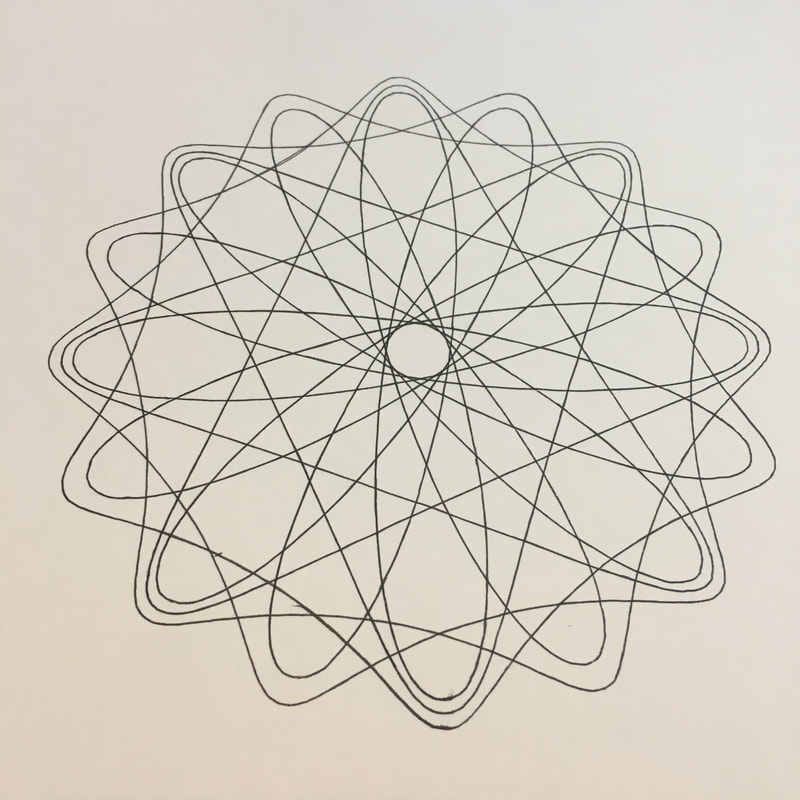 A simple way to make a engaging interesting looking design is to use multiple simple designs. This one is made by using one design from each of three different gears. Selecting which gears to pair together can be a challenge when there are so many options to choose from. In this design the three component simple designs from the three different gears have 8, 16, and 16 petals. But the gears weren't selected with that knowledge in advance. How then do you make a design like this without lots of planning and testing; which is a fine way to go about it too but I want to show that it isn't the only way. I selected a 160 ring and a 120/96 hoop which I had out from another design that I was working on. I decided that the 160 would be stationary with the 120/96 inside it and free to move. That gave me an internal ring on the hoop of 96. I wanted a relatively simple design so I picked gears with a large common multiple that they shared with the 96. I selected 24, 48, 72 (1/4, 1/2, and 3/4 of 96 respectively). Another way to look at that is that I picked gears that shared lots of common factors with the 96 ring and with each other.  All the different pieces used to create this design Aligning all the pieces at the 6'oclock position with the darts I started with the 24 1A, then 48 1B, and finally 72 2A. If this short time lapse is too fast you can adjust the play back speed to slow it down to 0.25x speed.
The pieces used in this design are: 160 ring (Plentiful Gear Set or Full&Plentiful Hoops Gear Set) 120/96 hoop (Full&Plentiful Hoops Gear Set) 72 gear (Compact Gear Set) 48 gear (Compact Gear Set) 24 gear (Compact Gear Set) Today I'll be discussing the process of making this piece: 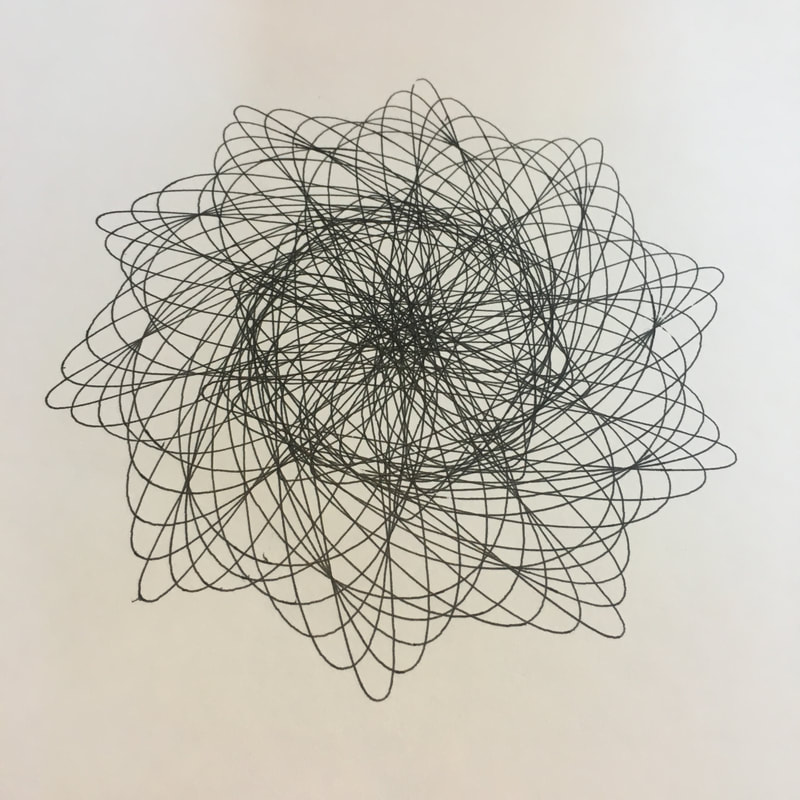 The pieces I used to make it are: 160 ring (Plentiful Gear Set or Full&Plentiful Hoops Gear Set) 120/96 hoop (Full&Plentiful Hoops Gear Set) 48 gear (Compact Gear Set) I used the 210/160 hoop from the Full&Plentiful Hoops Gear Set and I held it still in the large oblong from the Nested Oblong gear set which is not necessary but made keeping everything still easier. How was it made? Start by aligning the gears like this: 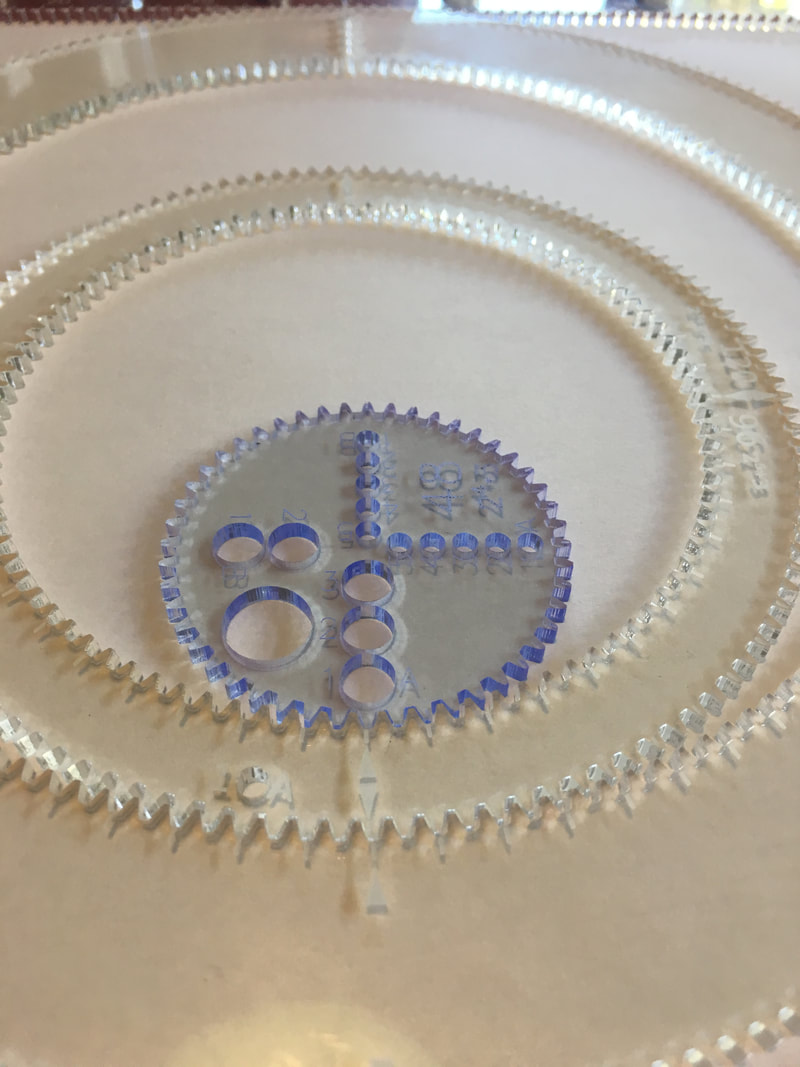 Hold the 120/96 hoop stationary and use the pen hole 1A. This will make an oval. The angle of the oval is determined by the rotation of the 48 gear. If the 1A hole was aligned at the bottom with the darts in the other pieces then the oval would be going radially into the center. By rotating the 48 gear by 12 teeth it makes the oval on a diagonal. One iteration of this looks like this: 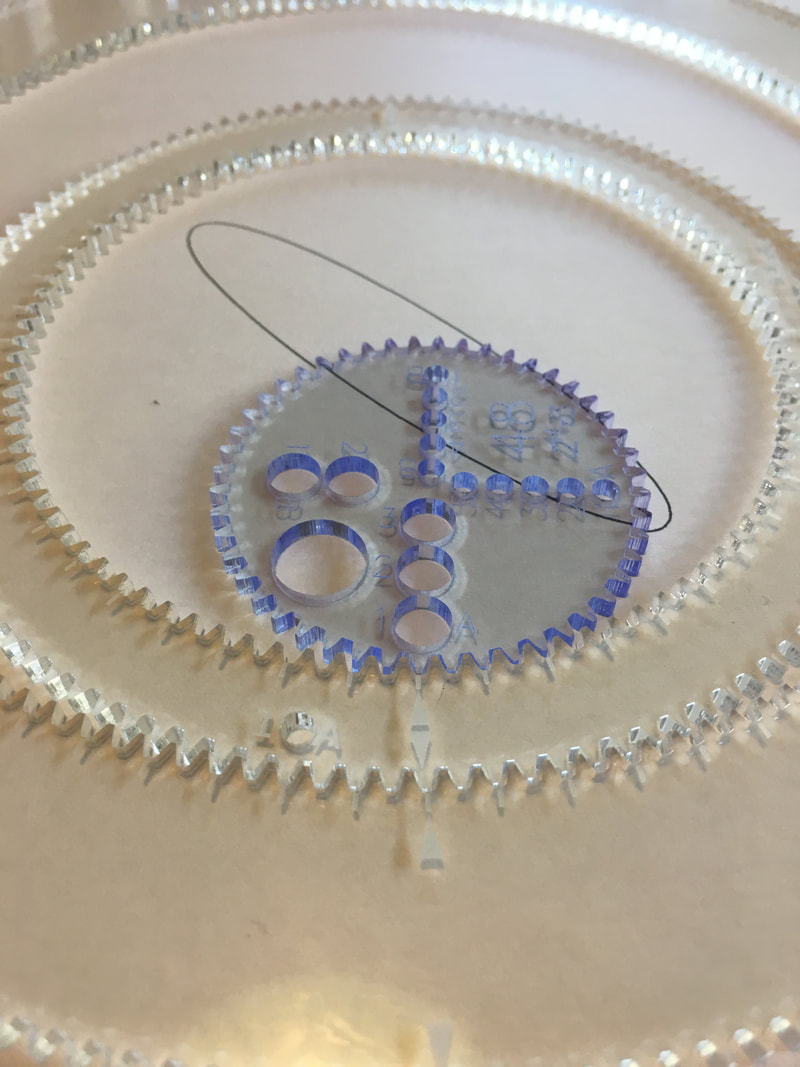 To make the rest of the design you step the 120/96 hoop 2 steps clockwise around the 160 hoop. Keep the 48 gear in the same spot in the hoop. This means that you move the 48 gear and the hoop together and that column A of medium pen holes always stays lined up with the triangular darts on the 120/96 hoop. With each two tooth step and repetition of the design you change pen holes going up and down the small pen hole A column. 1A to 2A to 3A to 4A to 5A to 4A and so on up and down. Yesterday I posted the Art Recipe 2 but there was a mistake in the recipe I'd posted. The first take away from this is that I should make actual notes while making the art rather than type it up after an evening of creative experimentation. Down to the detective work to find out where I'd gone wrong. I knew I had the gears right because I had a photo of the setup that I'd used. And I had a photo that I'd take on the first half of the design where it is easier to see the patterns.  Reference photo that I am trying to re-create I was pretty sure that it wasn't many steps that I was doing with the hoop and with the gear and while I thought I know which direction I was moving each gear I could no longer be sure. To begin my investigation I set about testing a few simple combinations. Each test helped me get a better intuitive feel for how the different combinations of movements changed the design. Also, I quickly came up with a simple notation for myself at the top of each page after realizing that I was going to loose track of what I was doing almost immediately if I didn't. After doing a few of these I started to think more critically and try and work out what I could deduce because even if I was only searching in the space of three steps or less that was 36 different combinations to test and that was going to take far too long; especially if I could be clever and make it easier. My first realization was that I could look at the reference picture to see how many times I had iterated the base 9 pointed design. This would tell me how many times I was shifting the hoop to the right. Every two steps of the bottom of the hoop is like translating it one step right in terms of hoop position. 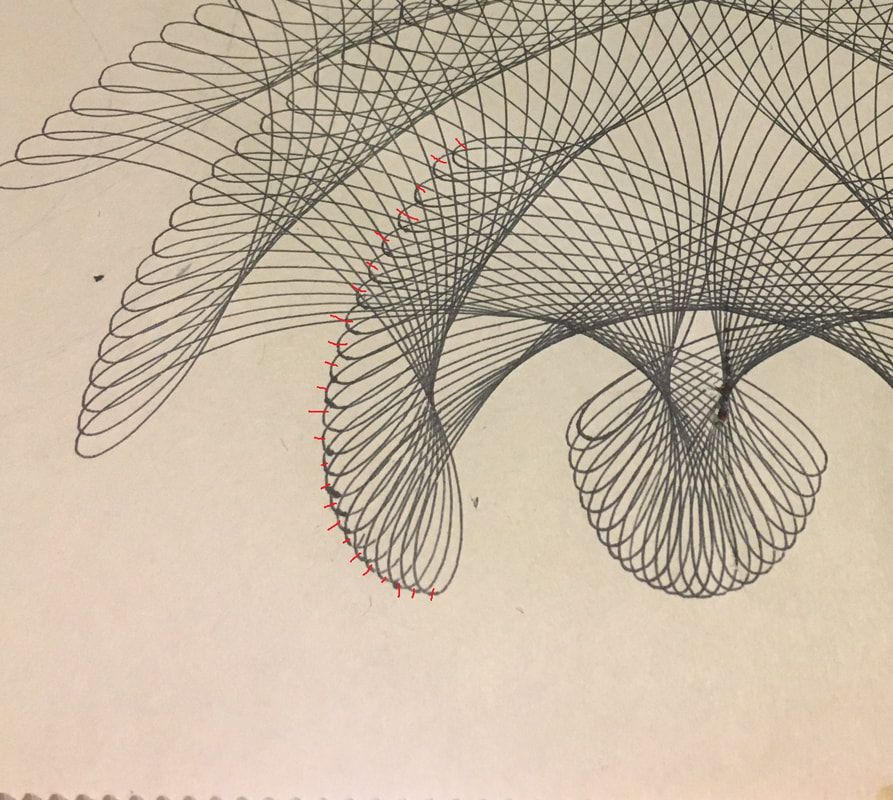 The red marks count the number of repetitions of the base design Picking one of the fans created by shifting and rotating the design I counted 24 instances of it. Combined with the fact that I knew that the design had been concluded somewhere in the 20s on the oblong this helped me conclude that it must have been made with 2 step increments on one side of the hoop. That nailed down the parameter as 2(right). Next I looked at the designs that I'd made and the one I was trying to copy and saw that on the same fan of petals that I counted when I stepped the gear to the right it did not make that counter clockwise progressing swoop. From there I determined that I would explore the left stepping solution space. Instead of trying the few combinations at hand now I was able to make one more deduction. If I step the hoop two steps right and the gear 1 steps left it is very similar (but not identical) to translating the hoops top and bottom both 1 right. The movements almost cancel each other out as I'd seen in hoop 2 right and gear 1 left. I'd also tried hoop 1 right and gear 1 left and I figured that would make something similar to hoop 2 right and gear 2 left and that wasn't the shape I was looking for either so I opted to try hoop 2 right gear 3 left which worked out. 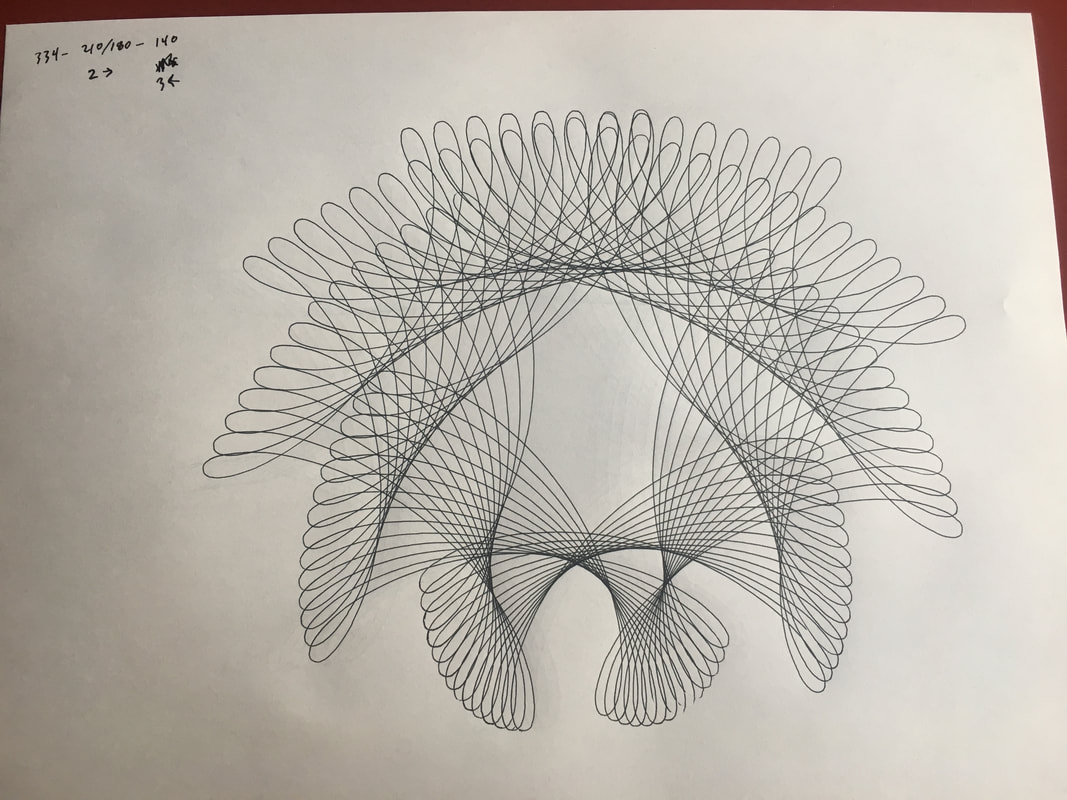 Other things to note take away from this is that the translation of the center of each 9 pointed design is shifted to the right with each iteration but because of the 3 left steps of the gear the pattern itself rotates to the left making the characteristic fan shape that was counted.
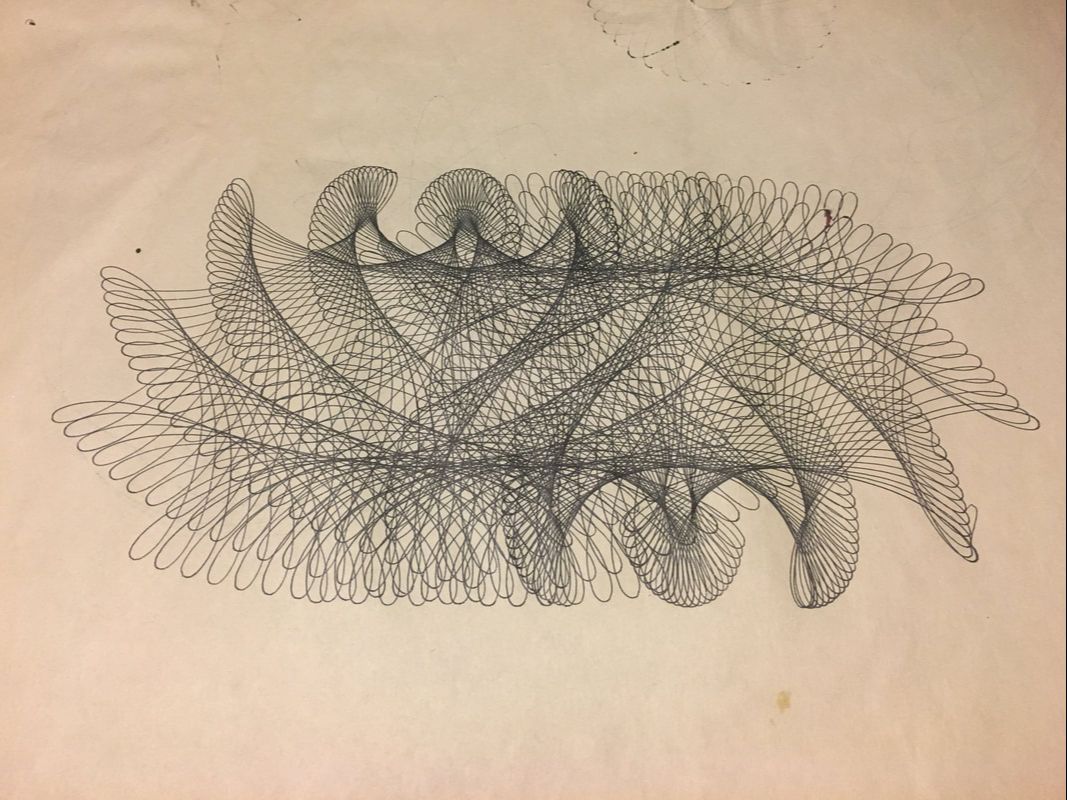 Made with the Nested Oblong Gear Set and the Full Page Gear Set. Using the large oblong (334), the 210/180 hoop, and 140 gear. Center the 210/180 hoop at the 0 mark in the oblong ring. align hole 3A with the bottom (closer to you) of the hoop in the oblong. Complete the simple design with the 3A in the 140. Repeat this design many times. Between each repetition make these two moves: 1) step the bottom of the hoop two teeth to the right 2) step the 140 gear three steps to the left (clockwise) This design was taken out to about the 27 mark on the right hand side of the oblong rack. This completes the first half of the design which looks like this: 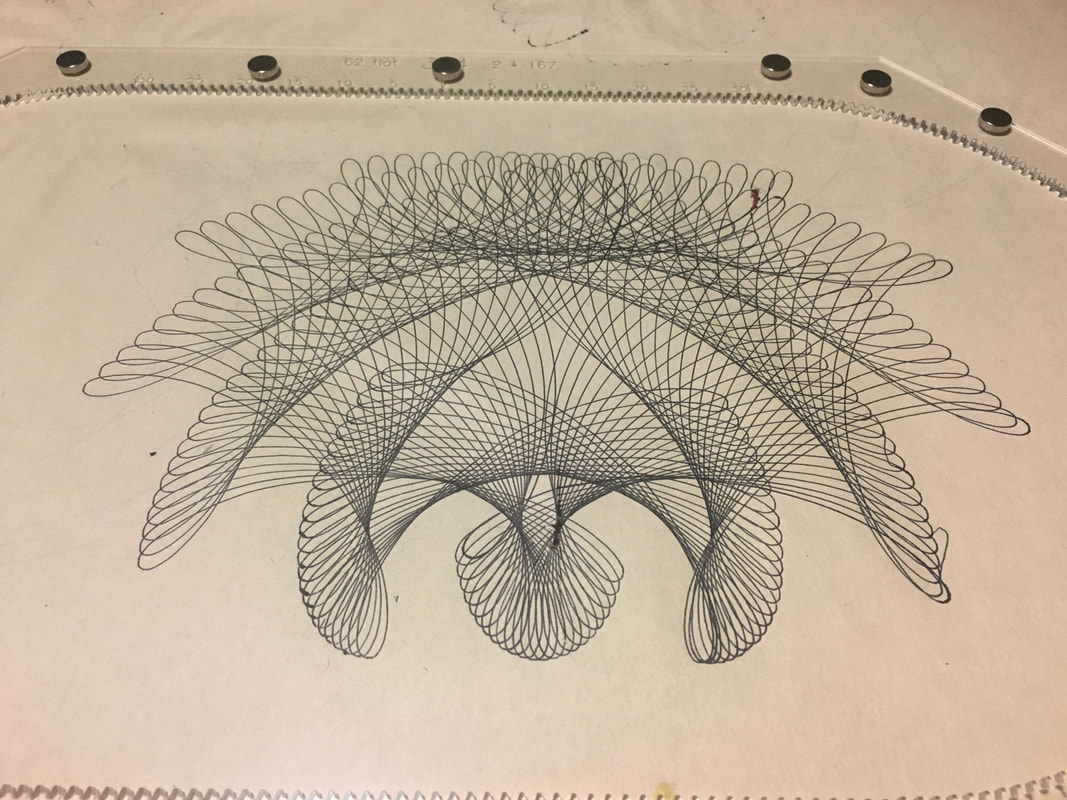 To make the completed design reset the gears to the starting but with the 140 aligned to the top of the oblong at the zero point.
Do the simple design and this time the steps between each repetition are: 1) step the top of the hoop two teeth to the left 2) step the 140 gear three step to the right (clockwise) completing this set of simple designs and translations completes it to look like the top picture. Note: This recipe has been corrected about 24 hours after being initially posted. Step 2 used to indicted that the 140 gear should be moved 1 step instead of three. Thank-you to Angie Woollard for pointing out the mistake.  Made with the compact gear set. Using the 96 ring, the 72 gear (with 36 ring in it), and the 24 gear in that. The 24 in the 36 makes a 3 pointer design. Start with the 72 gear at 6 o’clock in the 96. Position the 72 so that the 36 is at 6 o’clock. Align the 24 gear so that the 1B pen hole is one gear tooth off of the 6 o’clock position. Hold the 72 gear still and make one copy of the 24 in 36 design. Shift the 72 6 teeth in one direction and repeat the design. With each set of steps the 1B pen hole and 36 cutout should remain as close to the edge of the 96 ring as possible. Repeating this design 16 times will complete the design. 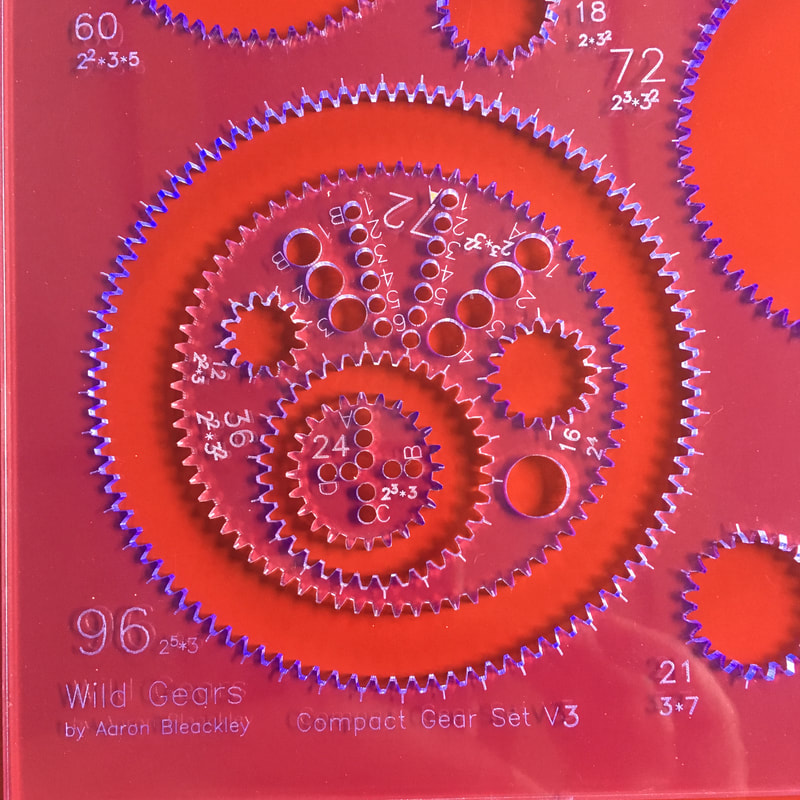 Note: the photos of this gear set are of a V3 fluorescent blue gear set so it doesn't perfectly represent the improved appearance of the V4 compact gear set.
|
AuthorAaron Bleackley, designer of Wild Gears Archives
October 2023
Categories |
Wild Gears
BLOG and
BLOG and
Newsletter

 RSS Feed
Proudly powered by Weebly