• Home
  • Buy Wild Gears
  • Wild Gears: Details
    • Compact Gear Set
    • Hoops Gear Set
    • Encyclopedic Gear Set
    • Full Page Gear Set
    • Plentiful Gear Set
    • Enormous Gear Set
    • Enormous Hoops Gear Set
    • Strange Shapes Gear Set
    • Strange Shapes 2 Gear Set
    • Oval Gear Set
    • The 120 Gear Set
    • Nested Oblongs Gear Set
    • Modular Gear Set
    • Full & Plentiful Hoops Gear Set
    • Mammoth Gear Set
    • Triangle Hoops Gear Set
    • Doughnut Pieces
    • The Kitchen Sink Gear Set
  • Wild Gears: Videos
  • Contact
  • Links and Resources
    • Numbers on Strange Shapes
    • Math and Predictions
    • Tips about Pens and Paper
    • Shipping
    • FAQ
  • Blog
  • Gallery
  • News and Coupon Codes
  Wild Gears

BLOG and
Newsletter

Wild Gears Technique #2: Notation

5/11/2018

2 Comments

 
I've been making my own shorthand notation for how I made designs for several years now and slowly refining it.

This post can be a starting point in trying to codify any of it.  Hopefully this will be the start of a useful shorthand.

Today, I'll lead with the picture and we can work from there.
Picture
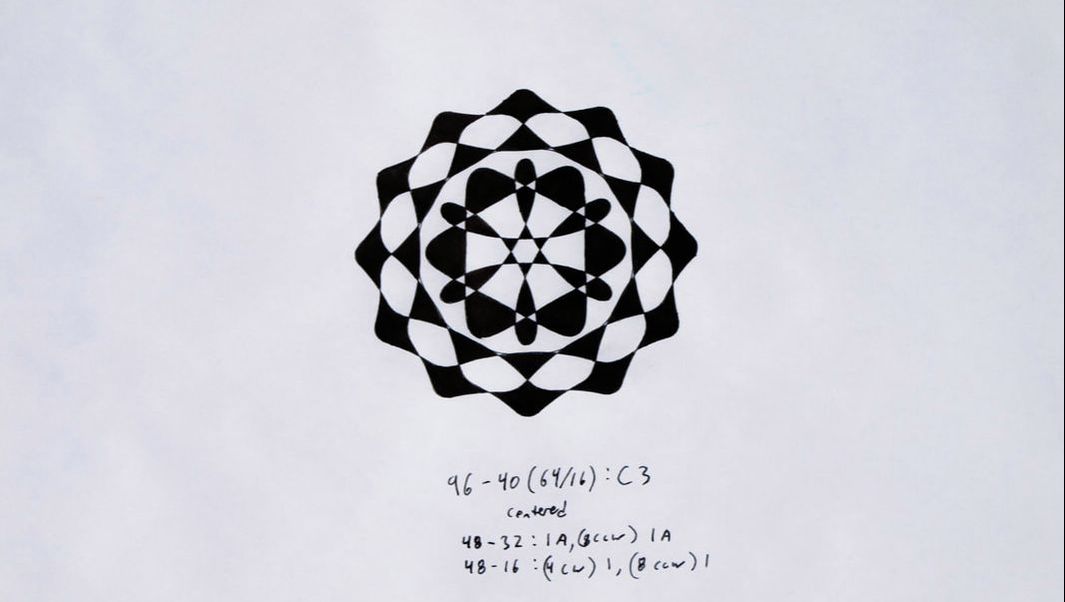
I made a complex piece using several designs layered on each other.
Lets start with a copy of the notation below the design and then I'll break down what each part means and why it is structured the way it is.  Hopefully this description will enable you to make use of the notation for yourself if you are so inclined.

96-40(64/16) : C3
centered
48-32: 1A, (8 CCW) 1A
48-16: (4 CW) 1, (8 CCW) 1

There are four lines; each giving information about a different stage of the design.
  1. "96-40(64/16) : C3" read from left to right the information will start with the stationary object '96' tells you the tooth count.  It is implied that it is a ring rather than a gear as that is the more common use.  If it was a gear it would be '96g'.  The '-' separates the stationary object from the moving object. '40(64/16)' denotes the gear to be used.  This is notation for a non-cicular gear with 40 teeth, sides made from 64 tooth circles and corners made from 16 tooth circles.  It could be written to say what shape it is too like '40(64/16)(square)'.  Currently there are not many non-circular gears where that is a needed level of clarification.  "C3" shows what pen hole to use.
  2. "centered" would have been better for me to have written as "48 ring centered".   The 96 ring is taken away and the 48 tooth ring put in place.  I chose it because it filled the center whitespace in the design nicely and so was actually very easy to center quite precisely.
  3. "48-32: 1A, (8 CCW) 1A".  Use the 48 tooth ring and the 32 tooth gear.  Use pen hole 1A then move the gear 8 teeth Counter ClockWise then use pen hole 1A again.  There are several assumptions hidden in this simple instruction.  These designs are all noted with relative position so you need to start in the same place for them to give a reproducible result.  Unless otherwise noted I start my designs with the pen hole that is to be used at the 6-oclock position in the gear and the gear in the same position in the ring. (See the picture below for example)
  4. "48-16: (4 CW) 1, (8 CCW) 1".  This step keeps the 48 tooth ring in the same place but changes the gear to be a 16 tooth gear.  Position the gear in the standard starting position and then move it "(4 CW)" 4 teeth ClockWise before using pen hole 1.  Then reposition the gear 8 teeth Counter ClockWise then use pen hole 1 again.

These steps form the lines of the design.  I then coloured it in a checkerboard pattern starting by colouring all the outer cells and alternating on my way into the center of the design.
Picture
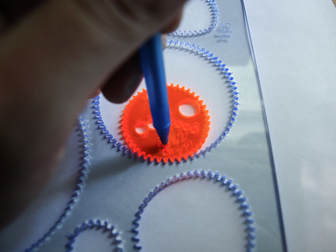
This picture is a visual reference for the 6 O'clock starting point described in step 3.  In this case it would be for the design 72-42: 2A.

This is a starting point for developing a broader notation involving more details and types of designs.  This should prove to be a robust starting point for gear-in-ring style designs.
2 Comments
Pete
6/12/2019 11:59:18 pm

This is awesome and just makes sense. Im not sure how to say this, but I have been seeing this in my mind yet not with this exact language. I am glad I found this as it helped me connect more dots.

Reply
JH Roberts
6/18/2021 10:01:43 pm

"Position the gear in the standard starting position and then move it "(4 CW)" 4 teeth ClockWise before using pen hole 1. Then reposition the gear

>8 teeth Counter ClockWise then use pen hole 1 again.<

Is this 8 teeth from standard position or 8 teeth from where we are now?

Reply


Leave a Reply.

    Author

    Aaron Bleackley, designer of Wild Gears

    Archives

    December 2022
    September 2022
    July 2022
    January 2022
    November 2020
    March 2020
    November 2019
    October 2019
    August 2019
    January 2019
    May 2018
    June 2017

    Categories

    All

    RSS Feed

Proudly powered by Weebly
  • Home
  • Buy Wild Gears
  • Wild Gears: Details
    • Compact Gear Set
    • Hoops Gear Set
    • Encyclopedic Gear Set
    • Full Page Gear Set
    • Plentiful Gear Set
    • Enormous Gear Set
    • Enormous Hoops Gear Set
    • Strange Shapes Gear Set
    • Strange Shapes 2 Gear Set
    • Oval Gear Set
    • The 120 Gear Set
    • Nested Oblongs Gear Set
    • Modular Gear Set
    • Full & Plentiful Hoops Gear Set
    • Mammoth Gear Set
    • Triangle Hoops Gear Set
    • Doughnut Pieces
    • The Kitchen Sink Gear Set
  • Wild Gears: Videos
  • Contact
  • Links and Resources
    • Numbers on Strange Shapes
    • Math and Predictions
    • Tips about Pens and Paper
    • Shipping
    • FAQ
  • Blog
  • Gallery
  • News and Coupon Codes